Friday, December 08, 2006

Cabling


Making the cabling inside the box is more demanding than soldering the kit. It'a an time consuming task.
I allready powered it up but can't change frequency on the display so I hope it's just some cables that are not connected yet. Programed the frequency counter but have to review again the instrutions. Power led lights up so the RIT led :). Got the volume working today.

Sunday, November 19, 2006

Almost there!


4 boards are done, now only the 17 band module neds to be done, cabling and enclosure also.

How to solder SMD


My technic.... the photo speaks for itself. The clam is an negative type one (normaly closed).

Wednesday, November 15, 2006

Almost finished

...Yes almost, the main boad is done except for testing and conections to panel components.

There is still the 17m bando module to complete and the bandpass filter.
Some garbage whas created during the build process and will go to an recicling facility :)

The final panel lettering layout will be like this:

Sunday, November 12, 2006

Groupe 10 almost and more on the front panel.


The front panel was painted and meanwhile did sone soldering on groupe 10, actualy only the resistors are missing...still didn't found yet the solution for the letering on the panel. Searching for mecanorma rub-down leters on the speciality shops around but no luck so far, I need white leters and of small size... will get back to this later.
Here's how the board looks now:

Friday, November 03, 2006

Front panel

Started the front panel. Well not exactly, it was the front panel for one radio I was building by my own design and the project got stoped so why not reuse since the controls were to be basicaly the same.

Because sone of the holes for potenciometers were bigger than the speaky ones I will buy sone new potenciometers.
The dificult part will be the color for the panel...what do you think... aluminum, black or white?
Lettering will not be easy I am researching the web but found no magic solution for it.

Frequency counter


.....done! Still neds to be programed... later on. No issues here... one extra 1 ohm resistor! Didn't found the place for "J3" (was J4 int the PCB) but never the less it works...
The cristal in the drawing is 4Mhz but on the kit was 8Mhz... There were suposed to be one 1N4146 and one 1N4148 in the bag but there were 2 1N4148... so I placed the 1N4148.

Sunday, October 01, 2006

Section 8 and band module 40 done


Yes, after some time without touching the soldering iron... I finished section 8 and band module for 40m.
Although not tested I am quit sure it will work :)
Already started soldering some components of section 9.
View the photo of what was built so far.

Monday, September 04, 2006

Section 7 done

I've finished section 7. The band module for 40m it's almost done and almost the components of section 8 are in place.
Testing section 7 I only have 6.54mA (insted of 10mA) for the quiescent current. Have to check in the manual if it's ok.
Here's the photo with all that was built so far.

Saturday, September 02, 2006

2nd mistake

.....#%$"!$#%"#$%, I did one big mistake, I soldered in the wrong position one IC... and not one of the small ones... de 4046 one. Big errors big solutions, I cuted the IC legs, removed the remaining pins, bought an new IC and soldered directly to the PCB.
Bought 2 trimpots for the IF filter and started section 8 without finishing section 7. Will post some pictures later on.

Sunday, August 27, 2006

I'm back

After some days without doing anything usefull on the "speaky" I did group 7. So far so good except the 2 triming potenciometers are not the metalic ones and don't fit in the PCB. I have to buy 2 or make some adaptation.


Meanwhile I started the 40m band module.

Tuesday, August 15, 2006

Section 5 and 6 done.

Not exactly.... I still have to test section 6.
Nothing unusual here, one of the "extra" resistors from the other sections was needed in section 6 (so no extra components ;-( ). Broke one of the glass diodes (dam!!!) but I think the diode is working so was left in the PCB.

The photo doesn't show section 5 and 6 complete (was taken before completion).

Sunday, August 13, 2006

No work done for the past 3 days

I am getting lazy... didn't build any part of the "Speaky" for the last 3 days.

Friday: There were fires visible from my shack... and I didn't had de mood to make more heat than the one in the fires. Fire destroyed an very nice place were I usualy ride my bike. There were more than five hundered fires active in Portugal this day.


Saturday: All day working on my bike shop so I had no time to make some soldering, insted the normal bike problens... cranks, chain, derraieur, etc, etc

Sunday: ...it's Sunday and I need a break... went to the beach in "Peniche" and as usual by this time in the year the beach was full...
The foto was taken in the winter so there's no people in the photo :)

Hope to get back to the soldering job by tomorow.

Thursday, August 10, 2006

Sound


Sound!
It's "hum" but section 4 is working!
Nothing more to add here except I was left with 4 extra diodes wich I think will be necessary to section 5.

Section 3 done!


Just finished section 3. It oscilates. Nothing to report except I got 2 spare resistors and pin 7 doesn't fit's in the "hole" so I placed one "black" pin. There was an missing 470p capacitor but I had one in the junk box.
When/if I finish the Speaky project I will post an list of missing/extra components :) So far I have more extra than missing.

Values of frequency are within range expected and also voltage at test point, osciloscope is 1V/Div.

Power outage :(


Yes, this night (9/08/2006) we had an power outage afecting part of the city, so, for 2 hours there was no mains power. This afected speaky progression... I could had connected the 12v soldering iron to the solar power batery, insted I went to bed.

Tuesday, August 08, 2006

First issue!

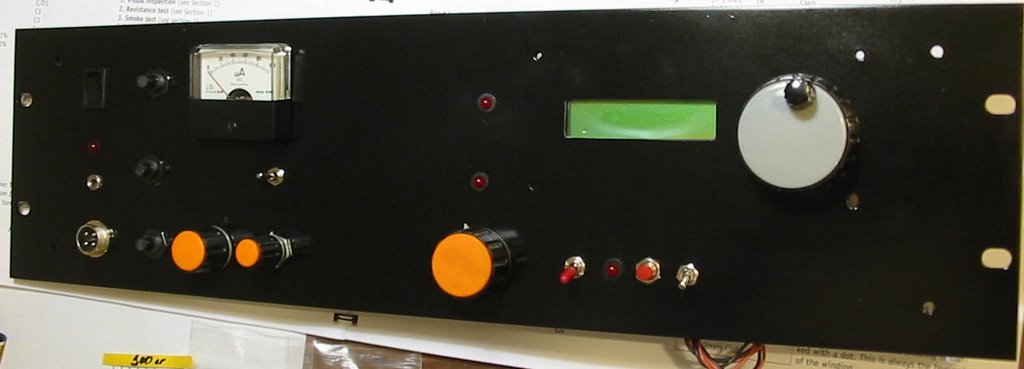
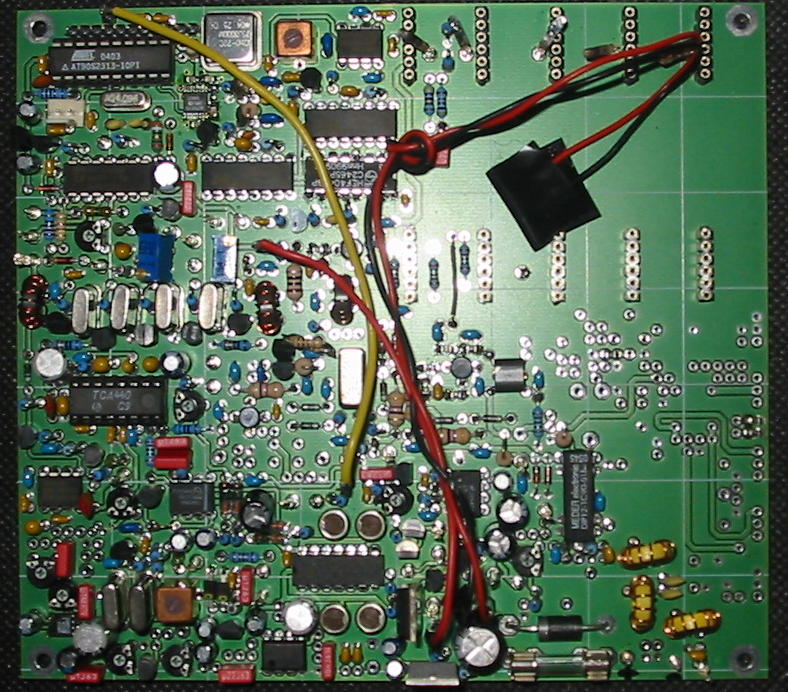
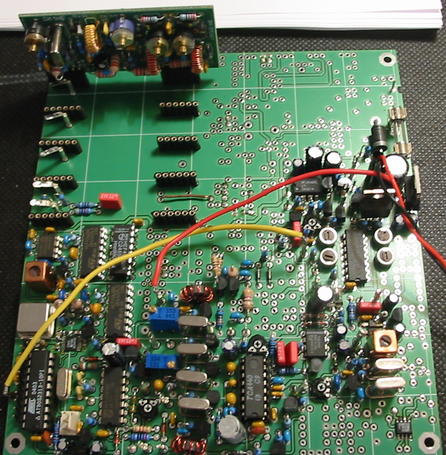
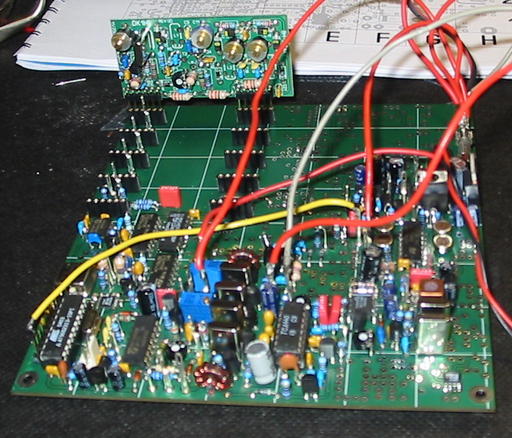
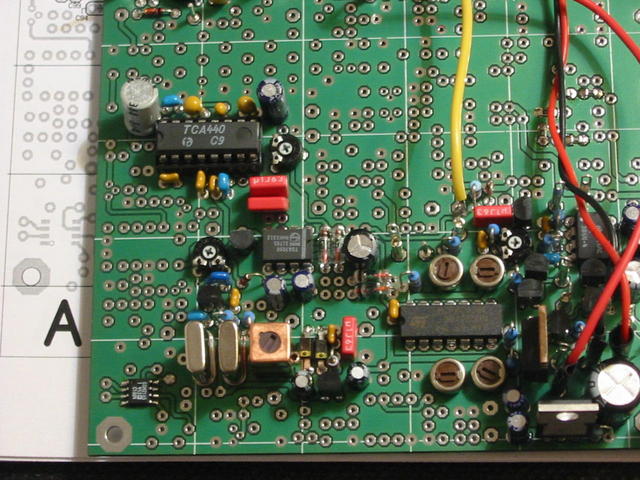
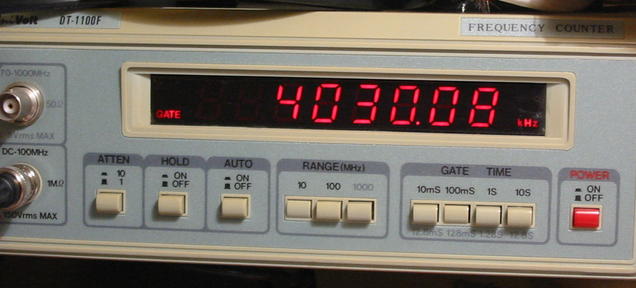
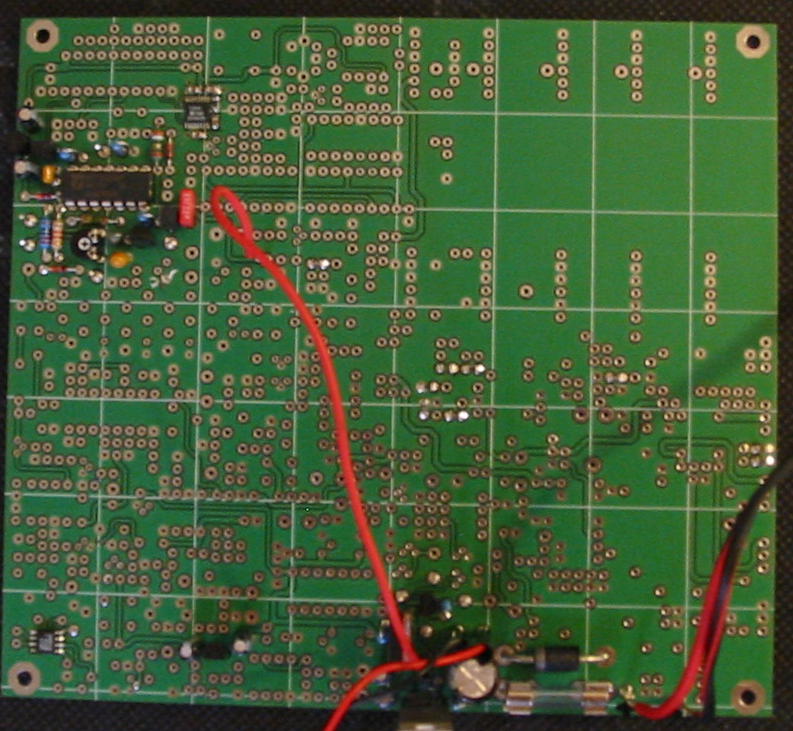
Testing section 2 I found that one of the values refered in the English manual were not according to my readings.... investigating and looking on the schematic I found that I had to connect pin 11 to 41 and 10 to 42 to give me correct values on pin 39 and 40 (was writen on the english manual but I only saw later).

The other issue is pin 13 (Weichtast output) , I don't have an +10V (acording to the manual) reading but have 1.6 (were are the others 8.4V ?) backtracing from the schematic I can't figure it out (not backtracing deep enought?), I should have a litle bit less than 10V on the emiter of T25 if I had 10V on pin 10 of IC13, I will carry on the building and get back to this issue ASAP. The other possibility is a broken port of IC13 but it's an remote chance (will be investigated anyhow) because the other ports of it are working :-|.
Will investigate also T24 that could be causing this and haven't looked that possibility yet.

Change in plans, while I was writing this post I was also looking at the schematic manual avaiable on the net, and on page 41 there are some logic stats on the IC13 pins and that is more coincident with the values I have got.... I think I will build next stage and check values again before I ask the some silly question to the German boys :)

...Adendum: There is also in the manual information to provide 10V to other pin on the board (I didn't saw on the manual the first time)... It's now working as suposed to.

Sunday, August 06, 2006

No soldering today...

I took a brake in the Speaky and went to the "Pedrogao" beach, after all it's sunday and there were 40ºC around here...


The beach today was more or less like this:

Saturday, August 05, 2006

TR switching ready...

Finished the TR switching part.
No major problem but I need an smaller plier to place some of the pins due to the high density of components on the board.
From the bag just one resistor and one capacitor found no place on the schematic, probably an bonus component :)
The IRF9520 transistor on the schematic is an IRF9540 on the parts list and on the bag; didn't smoked on the test and an quick look on the datasheets shows similarities.

Friday, August 04, 2006

First smoke...

Did the first power on test, at first no current on the meter then I switched the power on :)
View the image, meter is in mA.

...no smoke just plain nornal values... no fun :)

First mistake...

S..t happens, one capacitor placed with the wrong polarity, verified the mistake as soon as the solder got cold! No problem, removed the capacitor and placed it again correctly." Errare humanum est, persevera autem diabolicum" (to make mistakes it's humam nature but to repeat the mistake it's diabolik)

Wednesday, August 02, 2006

Baugruppe ready...

Productive day, "baugruppe" bags or "build group" are ready, except some static sensitive devices and inductances all is separated in the bags. The worst is to not knowing most of the words on the mecanical parts list. Also on the mecanic part's bag was an IC (or sort) with 8 legs on an DIP-12 socket (looks some isolating IC device) IC90-51 is the reference on the IC, could not see any reference on the list so or it was an bonus or later will be necessary (didn't checked all the components list on the other manuals).

Exchange some impressions with Allan Copland (GM1SXX) who is also building "Mr. Speaky" but more advanced than I am, he as an nice report at: http://www.observations.biz/speaky/index.htm
Allan likes "Superbock" beer :) and he is righ on saying that the buildup of this kit will give sone neck pains :)

Nikolai (DL7NIK) from the QRPproject send me the missing rotary encoder that was not included on the kit.

I "discovered" that my antenna analizer can read inductance.... cool! No more problems with those "animals" :)


No more for today, tomorow I will start soldering .... I hope.

Tuesday, August 01, 2006

Capacitors sorted... on to the silicium...

Yes, 80 minutes later capacitors were sorted... You better have an capacitance meter... because with some of the capacitors you just can see the markings under sun light.
On the list there are some lines with duplicate value but the components were all in the bag.
Now on will be faster to sort components because marks are biger.

Monday, July 31, 2006

Sorting capacitors


Whell... you better have an capacitance meter or an good magnifier glass, I have the capacitor meter...
As you can se by the image, it will be an big task sorting them out to put in the modules bag's.

Sorting resistors


With the kit came some plastic bags so you can sort components and put components there so it's more easy to sort them out when building by parts. (nice idea)
Resistors are allready sorted, now on to the capacitors.

First impressions


Yups, it's an small box with lot of surprises.... first one is the impressive amount of electronic components.
I decided I needed to clean the table from all the mess so I can dedicate only to the speaky.
After opening and removing all the bags and boards and papers it filled the table completly.
Before starting I decided that is better to check instructions first... they are included for some reason :)

The "Speaky" arrived

After some delay by the lack of ready kit's I received the Speaky.
Received the following parts:
* Speaky 5 band transceiverkit for SSB and CW Starter Version, incl. 1 Bandmodule of your choice
* Speaky Transceiverkit Bandmodule 17m
* Counter for the Speaky Transceiver