Another post for the GPIB series for an HP 3478 multimeter.

First code is how to display a string and then how to do a voltage readout.
Here's the code:
=== code begin
#!/usr/bin/python
import time
import pyvisa
import sys
rm = pyvisa.ResourceManager()
inst = rm.open_resource('GPIB0::20::INSTR')
line = []
def count(instrument):
output=inst.query("D2 CT2GQV")
print "Set display to: CT2GQV",
# print output,
count(1)
=== code end
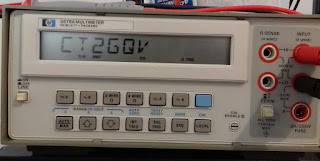
And the result:

If you want to read voltage (GPIB "F1" function) use the following code as example (no screenshot but similar to the code from previous posts series on GPIB), one version with graphical interface and another further bellow just from command line:
=== code start (graphical interface)
#!/usr/bin/python
import Tkinter as tk
import pyvisa
import time
rm = pyvisa.ResourceManager()
# GPIB ID of my instrument is "20"
inst = rm.open_resource('GPIB0::20::INSTR')
counter = 0
def counter_label(label):
def count():
global counter
counter += 1
dcvolts=inst.query("F1")
label.config(text=dcvolts+"V")
label.after(1000, count)
count()
root = tk.Tk()
root.title("HP 3478A DC Volts")
label = tk.Label(root, fg="light green", bg ="dark green", font = "Helvetica 18 bold italic")
label.pack()
counter_label(label)
button = tk.Button(root, text=' EXIT ', width=45, command=root.destroy)
button.pack()
root.mainloop()
=== code end
=== code start (read from command line)
#!/usr/bin/python
import time
import pyvisa
import sys
rm = pyvisa.ResourceManager()
inst = rm.open_resource('GPIB0::20::INSTR')
line = []
def count(instrument):
output=inst.query("F1")
print "DC Volts:",
print output,
count(1)
=== code end
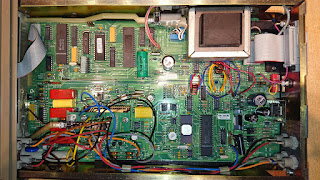
The multimeter inside look's like this:

Have a nice day!

First code is how to display a string and then how to do a voltage readout.
Here's the code:
=== code begin
#!/usr/bin/python
import time
import pyvisa
import sys
rm = pyvisa.ResourceManager()
inst = rm.open_resource('GPIB0::20::INSTR')
line = []
def count(instrument):
output=inst.query("D2 CT2GQV")
print "Set display to: CT2GQV",
# print output,
count(1)
=== code end
And the result:

If you want to read voltage (GPIB "F1" function) use the following code as example (no screenshot but similar to the code from previous posts series on GPIB), one version with graphical interface and another further bellow just from command line:
=== code start (graphical interface)
#!/usr/bin/python
import Tkinter as tk
import pyvisa
import time
rm = pyvisa.ResourceManager()
# GPIB ID of my instrument is "20"
inst = rm.open_resource('GPIB0::20::INSTR')
counter = 0
def counter_label(label):
def count():
global counter
counter += 1
dcvolts=inst.query("F1")
label.config(text=dcvolts+"V")
label.after(1000, count)
count()
root = tk.Tk()
root.title("HP 3478A DC Volts")
label = tk.Label(root, fg="light green", bg ="dark green", font = "Helvetica 18 bold italic")
label.pack()
counter_label(label)
button = tk.Button(root, text=' EXIT ', width=45, command=root.destroy)
button.pack()
root.mainloop()
=== code end
=== code start (read from command line)
#!/usr/bin/python
import time
import pyvisa
import sys
rm = pyvisa.ResourceManager()
inst = rm.open_resource('GPIB0::20::INSTR')
line = []
def count(instrument):
output=inst.query("F1")
print "DC Volts:",
print output,
count(1)
=== code end
The multimeter inside look's like this:

Have a nice day!
No comments:
Post a Comment